

Custom Gaskets
Redback Radiators can custom make gaskets to meet your specifications. Our Amada CNC punch allows us to quickly pierce gaskets to suit a wide variety of radiator bolt patterns or we can custom cut gaskets to your drawings or specifications.
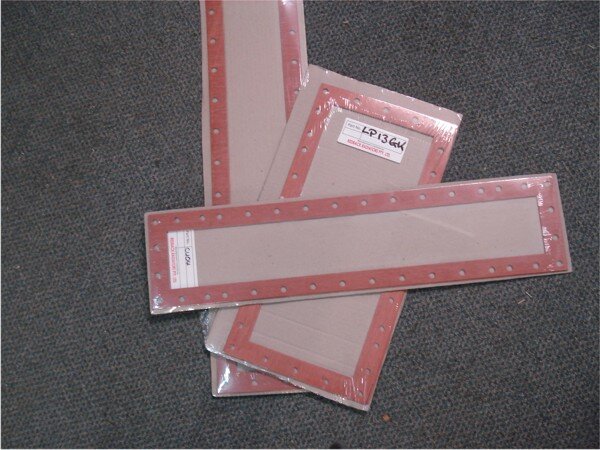
We carry an extensive range of popular radiator gaskets to suit: highway trucks, earthmoving equipment, agricultural machines and even generator sets.
The gaskets can be packaged with cores for storage and transportation.
Gasket material is the universally accepted Klinger C-6327.
This is suitable for liquids and steam at lower pressures and temperatures with low bolt load joints e.g. radiator tank to radiator header plate joins.
REDBACK RADIATORS PTY LTD are a specialist Manufacturer of heavy duty industrial copper and brass heat exchangers. We are an Australian owned and operated company that conducts 100% of our manufacturing in Australia.

The Klinger C-6327 used in our custom gaskets is 1.5mm thick and is manufactured to the above specifications.
Assembly procedure:
Ensure the mating faces of the radiator core and tanks are clean, free of damage, pitting and are straight & square in all directions. We suggest that sanding the mating faces and gently cleaning with a suitable solvent is done prior to assembly.
Position the gasket onto the headerplate of the core, sometimes a silicone jointing compound such as Permatex RTV blue may be required if the radiator tanks are badly pitted to ensure a good seal.
Check inside the side Straps and ensure the EPDM Foam Tape is in Good Condition, and forms a good tight fit between the core and the side strap. If the EPDM Tape is won. It is important to remove and replace with new EPDM Tape.
Using new nuts & bolts loosely assemble the radiator core, side straps, tanks and bolt rails. Once all nuts & bolts are in place tightening can commence. Starting from the inside and working outwards tighten to 22Nm (16 ft/lbs).
Once all the bolts have been tightened the radiator is now ready for testing. (If a jointing compound has been used please allow sufficient curing time prior to testing.
We suggest all radiators when assembled are carefully tested prior to fitting back into the vehicle or machine.